
Features
- Supports legged and fixed-based robots.
- Supports URDF robot file format.
- Collision detection with meshes, point clouds, and voxel grids
- Forward and inverse kinematics, forward and inverse dynamics
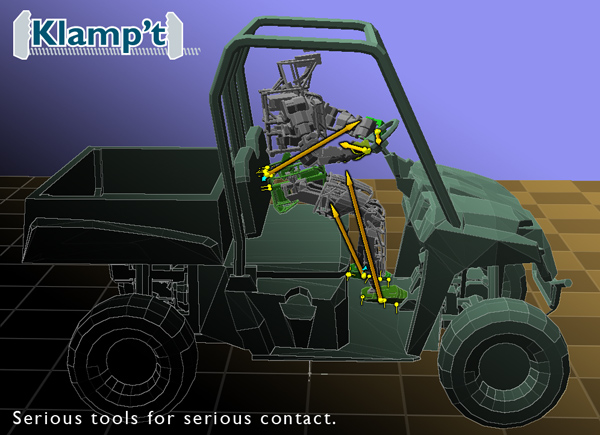
- Contact mechanics computations: force closure, support polygons, stability of rigid bodies and actuated robots
- Keyframe poser and path editor
- Integration with PyTorch, Casadi, and Sympy
- Unified interface to simulated and physical robots.
- Smooth motion generation and Cartesian control plugins to add to your own robot's controllers.
- Extrinsic calibration tools.
- Workspace calculation tools.
- Comprehensive file I/O for visual browsing, editing, and programming with reusable assets (joint poses, trajectories, etc).
- Robust rigid body simulation with triangle mesh / triangle mesh collisions.
- Simulation of PID controlled, torque controlled, and velocity controlled motors.
- Simulation of various sensors including RGB+D cameras, laser sensors, gyroscopes, force/torque sensors, and accelerometers.
- ROS bindings are available for broadcasting simulation data and reading robot trajectory commands.
- Many sampling-based motion planners implemented.
- Motion planning on constrained manifolds.
- Fast trajectory optimization routines.
- Real-time motion planning routines.
- Planning models are fully decoupled from simulation models, which helps evaluate behavior under errors and uncertainty.
Current version: 0.9.1
Languages: C++ and Python
Supported platforms: *nix environments, Windows, and Mac OSX.
Version 0.9.0 is a major update, with some API-breaking changes:
- Python API: type hints are available throughout the SWIG interface and in many native Python functions.
- Python API: direct Numpy interface speeds up large data copies. Tests indicate ~6x speedup (45ms->7.5ms) for getting a simulated sensor image (SimRobotSensor.getMeasurements()), ~80x speedup (160ms->2ms) for converting images to point clouds (PointCloud.setDepthImage/setRGBDImages), and 20x speedup (200ms->10ms) for converting a Numpy array to a point cloud (tested on 640x480 images).
- Python API: major updates to the Klampt control package, including the new klampt_control utility that lets you control your robots in real time. (API-breaking change)
- Python API: standardization of robot semantic information under a RobotInfo class in klampt.model.robotinfo. Supported by klampt_control and klampt_sim. Future planners and system integration utilities will use this structure.
- Python API: klampt_resource script added which allows transfer and conversions of resources from the command line. klampt_thumbnails has been removed since all thumbnail functionality has been moved into klampt_resource.
- Python API: new system integration utilities, such as calibration (klampt.model.calibrate) and workspace calculation (klampt.model.workspace).
- C++ API: Everything added to the Klampt namespace. (API-breaking change!)
- C++ API: Main modeling classes renamed to align with Python API, e.g. Robot->RobotModel, RobotWorld->WorldModel, WorldSimulation->Simulator, etc. (API-breaking change!)
- Some geometries support slicing and ROI (region of interest) calculations. Slicing takes a slice of a geometry with a plane, and ROI calculations determine a region of interest of the geometry. Meshes and point clouds are supported.
- Other bug fixes and enhancements (see release notes in README)
Version 0.9.1:
- Removed GLUI dependency in default build mode.
- Updated GLEW to 2.1.0.
- Builds for Linux Python 3.10+ are now working again. (Mac OS 11+ support is still TBD.)
- IK solver now has a minimization mode and a prioritized solve mode.
- Fixed bug in simulation of affine joints when the joint angle can go negative. Also, internal affine transmission coupling is simulated in a fashion that's sensitive to the driver's PID constants.
- Minor performance improvements to IK; API for getting subset of Jacobian columns.
- Python API: substantial performance improvements to camera image retrieval (camera_to_images).
- Python API: new calls for getting subset of Jacobian columns.
- Python API: Added types.convert generic utility function.
- Python API: Fixed bugs with vis module picker. Also, appearances can now have a tint set to match the C++ API.
- Python API: Bug fixes and type hints in coordinates module.
- Python API: Bug fix with cost evaluation in EmbeddedCSpace working on the embedded vectors (e.g., causing problems with outputs from makePlan)
- Python API: Removed klampt_path app and added functionality to klampt_resource app instead.
Media
Klamp't uses a robust contact generation scheme for mesh-mesh contact
Wheel turning on the PR2. Motion courtesy of Dmitry Berenson at WPI. Compare with the real robot.
Staubli TX90 throwing a block
Hubo-II+ walking on flat ground
Hubo-II+ being tipped over on uneven ground
Hubo-II+ climbing a ladder
Hubo-II+ switching feet, demonstrating force-torque sensing capabilities. Motion courtesy of Andy Park at Purdue University
Comparison of Klampt's contact generation method against the GIMPACT method used in ODE / Bullet
Downloading and Installing Klamp't
Building from source
Quick start (Python API only)
- pip install klampt
- (optional) git clone https://github.com/krishauser/Klampt-examples
Complete-package installation tutorials are available for:
Precompiled binaries
Windows (32 bit) (up to date as of 12/1/2023). You must also install the x86 Visual Studio 2015 Runtime.
To compile your own C++ programs under Windows, you will need to 1) clone Klampt and KrisLibrary from git, then 3) unpack the correct precompiled dependency libraries to the Klampt/Library folder:
- Win32 dependency libraries, Visual Studio 2015, Debug build
- Win32 dependency libraries, Visual Studio 2015, Release build
- x64 dependency libraries, Visual Studio 2015, Debug build
- x64 dependency libraries, Visual Studio 2015, Release build
Documentation
Frequently Asked Questions
-
How does Klamp't compare to other simulators / programming environments (like ROS, RAVE, Webots, etc)?
The short answer: Klamp't is an all-in-one toolbox that specializes in robots with contact.
Unlike ROS, Klamp't is not an architecture for sensing and control on distributed hardware. Klamp't provides tools for modeling, planning, and simulation of robots with contact that are intended primarily for research and rapid prototyping. Klamp't comes with ROS bindings for its simulator and for reading point clouds. Klamp't is more cross-platform and lighter weight.
OpenRAVE is a similar library developed at CMU concurrently with Klamp't, but with a stronger focus on manipulation problems. OpenRAVE does not support legged robots. Moreover, simulation in OpenRAVE is often conflated with modeling and planning, whereas in Klamp't they are fully decoupled.
Klamp't differs from other robot simulators (e.g., Gazebo, Webots, V-REP) because it has better collision handling that lets it handle complex contact phenomena between unstructured meshes and even point clouds. Other simulators typically require a robot and its environment to be composed of simple geometric primitives or convex polyhedra, while Klamp't works well with polygon soup or point clouds directly from a CAD program or a depth scanner. Other simulators typically have better visualizations and sensor simulation capabilities. Klamp't ignores the bells and whistles and focuses on stable, robust contact.
-
I'm a robotics newbie, where should I start?
Most beginners should start learning the Python API and going through the examples in the manual. Exercises from an introductory graduate course on robotics are provided in the Klampt-examples/Python/exercises folder. An open-source textbook, Robotic Systems is being prepared, which will help you become more familiar with 3D transformations, configuration spaces, feedback control, and motion planning.
-
I was using 0.8.x, how do I migrate my code to 0.9?
C++:.
- Everything is now in the Klampt namespace, and classes match the corresponding Python classes. So, Robot -> Klampt::RobotModel, RobotWorld -> Klampt::WorldModel, WorldSimulation->Klampt::Simulator, etc.
Python:
- Module-level constants and functions have been renamed to conform to PEP8. You will receive a DeprecationWarning when you try to use the old names (e.g., klampt.io.loader.typeToExtension -> klampt.io.loader.type_to_extension). We are still using lowerCamelCase for class members to conform to historical usage.
- In the unlikely case that you were using the klampt.control package in 0.8.7, there are major changes that will require significant code rewrites.
-
How do I import my robot?
Klamp't reads from the URDF file format. It also uses a proprietary, simple ASCII format for defining robots (.rob files) which is much less verbose.
However, for simulation, Klamp't will need some special motor parameters (servoP, servoI, servoD, dryFriction, viscousFriction) that are not present in the URDF format. We recommend that you 1) add the special klampt XML tag in the URDF, or 2 run the URDFtoRob program and then edit the generated parameters in the .rob file. More details on this procedure can be found in the Klampt manual and the robot import tutorial.
Some tips for successful URDF tagging and/or importing:
- URDF contains separate visualization / collision geometry per link while Klamp't only uses a single geometry. To switch, toggle the useVisGeom setting in urdftorob.settings, or use_vis_geom attribute in the <klampt> URDF element.
- If imported meshes looks strange, try setting the flipYZ flag to true in urdftorob.settings, or the flip_yz attribute in the <klampt> URDF element.
- The mesh import/export paths can be set using urdftorob.settings or the package_root element in the <klampt> URDF element.
- To avoid converting geometry to the native .tri format, set outputGeometryExtension to the empty string ("") in urdftorob.settings.
- Dummy URDF links can safely be set to have 0 mass and inertia in the exported robot file. Zero-mass dummy links will not affect the simulation as long as they are fixed to a link with mass. You may also add the <link name="[link name]" physical="0"/> tag under the <klampt> element in the URDF file.
- For controller motion generation and trajectory optimization, it is very important to set reasonable velocity and acceleration limits in the exported robot file.
- SimTest allows you to tune joint PID constants and friction parameters during simulation by selecting "Window > Drivers" from the menu.
- Editing large .rob files is easiest in a spreadsheet program.
-
How do I choose good motor constants for my robot simulation?
This can be done by hand by tuning and "exercising" the robot in simulation. The SimTest program has a window for tuning constants (Window > Drivers) while the simulation is running; a general strategy is to turn up damping or friction until the robot doesn't oscillate, and then turn up stiffness to track the setpoint about as well as your physical system does. An automatic solution is given by the MotorCalibrate program, which will optimize the constants to match a dataset of sensed and commanded joint angles that you record while exercising the physical robot. Please consult its documentation for more details, and you may run ./MotorCalibrate Examples/motorcalibrate_baxter.settings as an example.
-
How can I make the simulator faster?
Simulation speed depends on several factors, including the number of rigid bodies, the complexity of the mesh geometry, and the complexity of contacting regions. Small robots with simple meshes may be simulated in super-real-time, while complex robots with very complex meshes might be 100x slower than real-time.
Usually, the bottleneck is contact generation and reponse, and its cost can be reduced by simplifying the mesh geometry using a 3D modeling program (e.g., Blender), or by reducing the value of the contact clustering parameter, maxContacts.
-
How can I test my behavior code using a Klamp't simulation?
Klamp't can be used for simulation testing of robot behaviors in a variety of ways. There are two main steps: 1) tuning the simulation engine to match the real world as closely as possible, and 2) matching the interface between the behavior and simulated robot to the interface between the behavior and the real robot.
Simulation tuning requires customizing the default rigid body simulator by setting up object models and surface parameters, and then adding forces, joints, etc. between objects in the world during the simulation loop. You may also add robot sensors to the simulation to imitate cameras, force sensors, etc. Klampt has a number of built-in sensor types, including RGB cameras, RGB-D cameras, laser rangefinders, force/torque sensors, IMUs, etc. If your robot uses more complex actuators and sensors, you must implement emulators for these items in the simulation loop. Essentially, an emulator tries to duplicate the robot's motor controller software, actuator behavior, and sensors given complete access to the simulation state.
To match the interface between the behavior and the real robot, we provide the Robot Interface Layer in the Python API which is a unified interface to real and simulated robots. You should write (or find) an RIL subclass for both the real and simulated robots such that they behave similarly when addressed using the klampt_control utility. Simulation RILs for position-controlled and velocity-controlled robots are built-in to Klampt. See the control documentation for more details
To connect ROS behaviors to a Klamp't simulator, see klampt/control/blocks/io/roscontroller.py. To connect Python behavior using Klampt's RIL to a ROS robot, use klampt/control/blocks/io/rosinterface.py.
-
How can I use Klamp't planning tools on my robot?
Klamp't planners and utilities must be incorporated into your robot's software environment via a bit of "glue code".
For example, a behavior may invoke a Klamp't planner when it needs a new path. The planner reads in the robot state and environment and uses Klamp't subroutines to generate a path. Then it calls klampt.model.trajectory.execute_path given the Klamp't RIL controller for your robot. (Python API) Paths are sent to your robot as piecewise linear or piecewise cubic curves if you have implemented the Robot Interface Layer of the Python API. See the control documentation for more details
Direct robot control in C++ can be achieved using a mechanism in Interface/UserInterface.h, employed in the UserTrials program. These interfaces read in user input, call a real-time planner, and then send the resulting path to a MotionQueueInterface object. In UserTrials, the interface sends the path to a simulated robot. But by overloading the MotionQueueInterface class with a custom subclass that communicates with your robot, you can control your robot directly. (We have code available for Staubli 6DOF robots, please contact us if you are interested.)
-
I noticed a bug! How should I report it?
Please report the issue on the Klampt Github Issues page, and we'll get right on it.
-
How should I get help using Klamp't?
Please use the Klamp't forum at https://gitq.com/krishauser/Klampt.
-
How should I acknowledge Klamp't in my publications?
For the Klamp't simulator, please cite K. Hauser. Robust Contact Generation for Robot Simulation with Unstructured Meshes. International Symposium on Robotics Research, December 2013.
For the trajectory time-scaling subroutines, please cite K. Hauser. Fast Interpolation and Time-Optimization on Implicit Contact Submanifolds. In proceedings of Robotics: Science and Systems (RSS), Berlin, Germany, June 2013.
For general usage, please cite the Klamp't Manual.

